
We’ve all been there. That sinking feeling when you realize dinner has turned into a black, stuck-on mess. It’s a universal kitchen mishap.
But before you reach for the nearest heavy-duty scrubber and start scraping away, take a breath. Most burnt-on disasters are completely salvageable, but your first move is critical. The right approach depends entirely on the pot's material.
Now loading...
Getting this first step right not only saves your cookware from scratches and permanent damage, but it also saves you a ton of time and frustration. This is your kitchen triage—the fastest, safest way to start the rescue mission before we dive into the more specific, heavy-duty techniques.
This quick decision tree will help you identify the best starting point for your specific type of pot.
Now loading...

As the chart shows, the material—whether it's stainless steel, nonstick, cast iron, or enameled—dictates the entire cleaning strategy. Let's dig into why that matters so much.
Match Your Pot to the Right Method
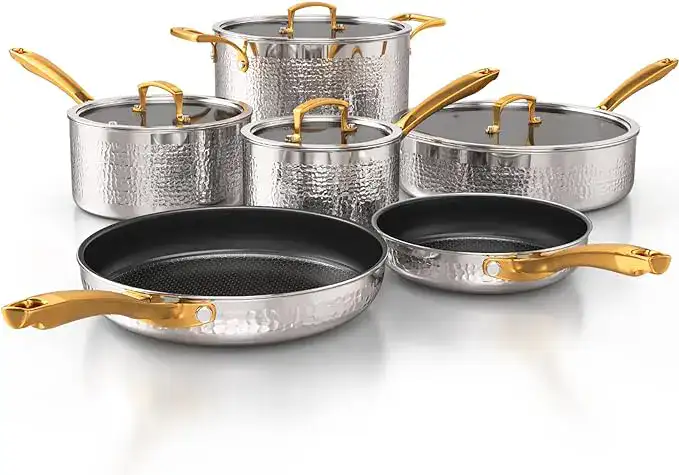 | Homaz life Stainless Steel Pots and Pans Set, Tri-Ply Hammered Kitchen Cookware with Glass Lids, Induction Compatible, Non-Toxic, 10-Piece |
Choosing the wrong tools or cleaners can cause irreversible damage. A steel wool pad that works wonders on a tough stainless steel pot could instantly shred a nonstick coating. Likewise, a long, gentle soak that helps a nonstick pan might lead to a rust nightmare on unprotected cast iron.
The initial cleaning method isn’t just a preference; it’s a critical decision based on your cookware’s material. Acting quickly with the correct gentle approach prevents a minor mishap from becoming a costly replacement.
And this isn't just an occasional problem. In households across major global markets, surveys show that over 68% of home cooks scorch a pot at least once a month, creating a persistent cleaning headache. You can learn more about these kinds of household cleaning challenges from market research by Spherical Insights.
To help you make the right first move, here’s a quick-reference guide to get you started. It lays out the best primary cleaning agents and tools for the most common pot materials.
Quick Guide for Cleaning Burnt Pots by Material
| Pot Material | Safest Primary Cleaning Method | Tools to Use | Cautionary Note |
|---|---|---|---|
| Stainless Steel | Simmering water with baking soda or vinegar | Wooden spoon, soft sponge, non-abrasive scrubber | Avoid steel wool for minor burns to prevent scratching. |
| Nonstick | Gentle soak with warm, soapy water | Soft sponge or cloth only | NEVER use abrasive cleaners or tools. They will destroy the coating. |
| Cast Iron | Coarse salt and oil scrub; minimal water | Stiff brush, chainmail scrubber, paper towel | Avoid prolonged soaking and harsh soaps to preserve the seasoning. |
| Enameled Cast Iron | Simmering water with baking soda | Wooden or silicone scraper, soft sponge | Avoid steel wool and sudden temperature changes, which can cause chipping. |
Using this table as your starting point ensures you’re treating your cookware right from the get-go. Now, let’s break down the specific steps for each of these materials in more detail.
Cleaning Stainless Steel and Enameled Cookware
There's a good reason stainless steel and enameled cookware are staples in so many kitchens—they’re durable, heat evenly, and look fantastic. But that bright, shiny surface also puts every scorch mark and burnt-on bit of food on full display, turning a beautiful pot into a kitchen eyesore.
The good news? You don't need a ton of elbow grease to bring them back to life. The real trick is letting a few simple household ingredients do the heavy lifting for you.

Gentle Simmering Solutions
One of the most effective, low-effort ways to tackle burnt food is to use a little heat and a mild acid or base to loosen up that stubborn carbonized gunk. This technique is a lifesaver for both stainless steel and enameled surfaces because it works without any risk of scratching.
Start by filling the pot with just enough water to cover the burnt mess. From there, pick your cleaning agent.
- White Vinegar: I usually go with a ratio of about one part vinegar to four parts water. The acetic acid in vinegar is fantastic at breaking down those tough, burnt-on spots.
- Baking Soda: A few tablespoons of baking soda dissolved in the water also works wonders. It’s an alkaline, which helps it cut right through burnt food and grease.
Bring your concoction to a gentle simmer on the stove and let it bubble away for 10-15 minutes. As it heats up, you’ll actually see the burnt bits start to lift off the bottom of the pot.
Once the simmering has done its job, kill the heat and let the pot cool down a bit. Grab a wooden spoon or a silicone scraper and give the residue a gentle nudge. Most of it should slide right off with hardly any effort. For a deeper dive, our comprehensive article has more tips on how to clean stainless steel pots.
Creating a Paste for Stubborn Spots
 | Non Stick Pots and Pans Set – Kitchen Cookware Sets with Lid – Induction Hob Pots Set – 8pc Non Stick Cooking Set – Cooking Copper Saucepan Pots and Frying Pan – Juego de Ollas Para Cocina – by Nuovva |
Every now and then, simmering alone won't get rid of a particularly stubborn patch. When you're left with a few holdouts, it's time for a more concentrated attack. A simple baking soda paste gives you just enough gentle abrasion to finish the job without harming your cookware's finish.
Just mix baking soda with a tiny bit of water until you have a thick paste—think toothpaste consistency. Slather it directly onto the burnt spots and let it sit for at least 15-20 minutes.
Pro Tip: For some extra cleaning power, apply the paste while the pot is still a little warm from simmering. That residual heat helps the baking soda work its magic even more effectively.
After it's had time to sit, use a non-abrasive sponge or a nylon scrubber to work the paste in a circular motion. This combo of chemical action and light scrubbing will lift whatever was left behind.
Of course, commercial kitchens dealing with this stuff all day often have more powerful solutions. You can check out some professional methods for cleaning stainless steel equipment if you're curious.
Using a Specialty Cleaner
When your pantry staples just aren't cutting it, a specialty cleaner made for stainless steel can be your best friend. A product like Bar Keepers Friend is my go-to for serious cases. It's formulated with oxalic acid, which is incredibly effective at dissolving rust, tarnish, and severe burnt-on food.
Just be sure to follow the manufacturer’s directions. You'll typically wet the pot's surface, sprinkle on the powder to form a paste, let it sit for a minute, and then gently scrub with a soft sponge. It works like a charm to restore that factory shine without leaving a single scratch.
Safely Cleaning Nonstick and Cast Iron Pans
When it comes to getting burnt food off your pots and pans, nonstick and cast iron cookware have their own set of rules. These surfaces are fantastic when you treat them right, but one wrong move can cause damage that’s impossible to undo.
With these pans, your top priority is preservation. Cleaning comes second.

The delicate coating on nonstick pans and the seasoned layer of cast iron mean that aggressive scrubbing is completely off the table. You need a gentle, methodical approach to protect your investment and keep your cookware performing for years to come.
The Gentle Touch for Nonstick Surfaces
The absolute number one rule for cleaning a burnt nonstick pan is to avoid all abrasives. Metal utensils, steel wool, and those heavy-duty scouring pads will instantly scratch the coating. Once that happens, it can start flaking off and loses its effectiveness completely.
My go-to method always starts with a simple soak.
- Fill the cooled pan with warm water and a few drops of dish soap.
- Let it sit for at least an hour. For really tough, caked-on messes, I'll even leave it overnight.
- This long soak does most of the hard work for you by softening and loosening the burnt-on gunk, which means way less scrubbing later.
After it has soaked, most of the residue should wipe away easily with just a soft sponge or cloth. If you have any stubborn spots still hanging on, a baking soda slurry is your best friend. Just mix a few tablespoons of baking soda with a little water until it forms a paste. Gently rub this paste over the burnt area with a soft cloth. Baking soda is a fantastic mild abrasive that lifts grime without hurting the surface.
Burnt food is more than just a kitchen headache; it can pose a health risk. The World Health Organization has found that food residues left in cookware can be a factor in the 600 million illnesses caused by contaminated food each year. Properly cleaning your pots is a small but critical part of keeping your kitchen hygienic. You can learn more about the global impact of food safety from reports published by MarketsandMarkets.
Protecting Cast Iron's Precious Seasoning
With cast iron, everything comes down to protecting the seasoning—that beautiful layer of polymerized oil that gives it a natural nonstick surface. Harsh soaps and long soaks are the enemy here; they can strip that layer right off, which leads to rust and food sticking.
So, instead of soap, grab some coarse salt and a little bit of oil to make a natural scrubbing agent.
- While your pan is still warm (but not screaming hot), pour in a generous amount of kosher or coarse sea salt.
- Drizzle in about a tablespoon of a neutral oil, like canola or vegetable oil.
- Use a stiff brush or even a folded-up paper towel to scrub the salt mixture into the burnt food.
The salt acts as the perfect abrasive, breaking up the gunk without scraping away that hard-earned seasoning. Once the burnt bits are gone, rinse the pan with hot water. And here's the most important part: dry it immediately and thoroughly. Leaving cast iron wet is just asking for rust to show up.
Finally, place the dry skillet back on a burner over low heat for a minute or two. Then, wipe a very thin layer of cooking oil over the entire inner surface. This last step is crucial for maintaining the seasoning and ensures your pan is perfectly prepped for its next use. For a deeper dive, check out our guide on how to care for cast iron made simple.
Sneaky Tricks for the Absolute Worst Stains
When your usual soap-and-scrub routine just isn't cutting it, you have to get creative. Some of the best solutions for burnt-on messes come from the most unexpected places. These are the secret weapons I pull out when I'm dealing with a caked-on disaster that seems truly hopeless.
One of my go-to hacks involves something you’d normally toss in the laundry: a dryer sheet. The conditioning agents in a single sheet are surprisingly great at breaking down those stubborn, sticky sugars and burnt residues. Just drop one in the bottom of the pot, fill it with warm water, and let it sit overnight. The next morning, you’ll be amazed at how easily the mess lifts away.
This isn’t just some old wives' tale, either. A 2022 Kantar survey found that 62% of households in Europe and Asia scorch their cookware at least once a week. Viral cleaning tests have shown that this dryer sheet trick can loosen up to 87% of burnt-on food. If you're curious about global food waste related to cooking mishaps, the Food and Agriculture Organization of the United Nations' website has some eye-opening data.
Let Nature Do the Heavy Lifting
Sometimes, the best cleaning agents are already in your kitchen. Natural acids and enzymes can do wonders on certain types of stains, especially on stainless steel and aluminum cookware that's looking a little dull or discolored.
- Lemon Slices: Got some cloudy stains or starchy buildup? Slice up a lemon, toss it in the pot with some water, and let it simmer for 15-20 minutes. The citric acid works like a charm to brighten the metal.
- Rhubarb: This one might surprise you, but the oxalic acid in rhubarb is a fantastic natural cleaner. Simmering a few stalks in water works much like lemons and is especially good for clearing up that filmy residue on aluminum pots.
For a more powerful, hands-off approach, you can call in the enzymes. A single dishwasher tablet is packed with concentrated detergents designed to obliterate baked-on food.
Heads Up: This trick is a powerhouse for stainless steel and enameled cast iron. But never use it on aluminum or nonstick cookware. The harsh detergents can cause pitting and will absolutely ruin the surface.
Just drop one dishwasher tablet into the pot, fill it about halfway with water, and bring it to a gentle simmer for about 10 minutes. Let it cool down completely before you touch it. The burnt food should be practically falling off.
For truly catastrophic messes, the principles behind how to safely boil out a fryer can offer some insight into deep cleaning. Knowing which method to use for which mess is the key to mastering how to remove pan stains for good.
How to Prevent Burnt-On Messes in the Future
 | Misen Nonstick Pots and Pans Set - Nonstick Cookware Sets - 9 Piece Essential Kitchen Cookware Set |
After spending all that time scrubbing, the last thing you want is a repeat performance. The best way to deal with a burnt-on mess is to stop it from happening in the first place. This isn't just about protecting your cookware; it’s about saving yourself time, aggravation, and perfectly good ingredients.
A few simple habits can completely change your cooking game, turning potential cleaning disasters into a smooth, enjoyable process.
It really all boils down to managing your heat. One of the biggest mistakes I see people make is cranking the burner up to high right from the start. Most dishes actually cook better over steady, medium heat. This gives your food a chance to cook through before the sugars and proteins on the surface have a chance to burn.
Properly preheating your pan before anything touches it is just as important. A cold pan is a sticky pan, plain and simple. When you drop food onto a surface that isn't hot enough, it grabs on and refuses to let go, which is the first step toward a burnt-on disaster.
The Role of Cooking Oil and In-The-Moment Fixes
Using the right amount of cooking oil is your secret weapon. It creates a crucial barrier between the food and the pot, acting like a temporary nonstick shield. You'll know the pan is perfectly preheated when the oil shimmers just slightly. That's your cue to add the food. If things start looking a little dry while you cook, don't hesitate to add another splash.
Now, even with perfect technique, some bits of food are going to stick to the bottom. Don't panic! Those little brown bits are called fond, and they're pure gold when it comes to flavor. They're the building blocks for incredible pan sauces, but if you ignore them, they'll quickly go from delicious to scorched.
This is where a classic technique called deglazing saves the day. All you have to do is pour a little liquid—like wine, broth, or even water—into the hot pan to lift that fond right off the bottom.
By deglazing, you’re not just preventing a burnt mess—you're actively incorporating flavor back into your dish. This single step can make the difference between a simple meal and a spectacular one, all while making cleanup incredibly easy.
Just pour in your liquid while the pan is still hot from the stove and use a wooden spoon to gently scrape up all those flavorful, stuck-on pieces.
Long-Term Cookware Maintenance
Beyond what you do during the cooking process, how you care for your pots and pans day-to-day makes a huge difference in preventing future messes. Good maintenance keeps your cookware in peak condition so it performs the way it's supposed to.
Keep this simple checklist in mind to get the most out of your kitchen gear:
- Season Cast Iron Regularly: After cleaning, always wipe a super-thin layer of oil onto your cast iron skillet. This maintains its natural nonstick seasoning and keeps rust away.
- Avoid Extreme Temperature Changes: Whatever you do, don't plunge a scorching hot pan into a sink of cold water. This can cause stainless steel to warp and can create tiny cracks (thermal shock) in enameled cookware.
- Clean Promptly: Try not to let dirty pans sit in the sink overnight. Food residue hardens as it cools, making it exponentially harder to clean off later.
- Store Properly: If you nest your pans, place a paper towel or a soft cloth between each one. This prevents scratches that can ruin nonstick and enameled surfaces.
Making these small adjustments will ensure that scrubbing burnt food off your pots becomes a rare chore instead of a regular kitchen nightmare.
Common Questions About Cleaning Burnt Pots
Even after you've mastered the basics, some burnt-on messes can leave you scratching your head. Let's tackle a few of the most common questions that pop up when you're faced with a particularly stubborn pot.
Can I Just Use Steel Wool on a Badly Burnt Stainless Steel Pot?
It’s so tempting, isn't it? When you're staring at a blackened, crusty mess, reaching for the steel wool feels like the most logical, powerful solution. But trust me on this one: it’s a shortcut you’ll regret.
While stainless steel is a workhorse, steel wool is an aggressive abrasive that will absolutely carve a network of fine scratches all over your pot’s beautiful surface.
These scratches do more than just ruin the shiny finish. They create microscopic grooves where food and oil can get trapped, making your pot more prone to sticking and burning in the future. You end up creating a frustrating cycle of scorching and aggressive scrubbing.
Key Takeaway: Using steel wool on stainless steel causes permanent damage that makes future cooking and cleaning harder. A little patience with gentler methods will keep your cookware in great shape for years.
So, what should you do instead? Stick to non-abrasive scrubbers, a thick paste of baking soda and water, or a trusted cleaner like Bar Keepers Friend. For the absolute worst-case scenarios, a patient strategy of repeated soaking and gentle scrubbing always works, preserving your pot for the long haul.
What's the Best Way to Remove Burnt Sugar?
A layer of burnt sugar can look like a hopeless, glassy black coating welded to the bottom of your pot. It seems impossible to remove, but the secret is surprisingly simple. Sugar’s biggest weakness is water. You don't need to put any muscle into this—just a little heat and liquid.
The trick is to dissolve it.
Simply fill the pot with enough water to cover the hardened caramel completely. Pop it back on the stove and bring the water to a boil.
As the water simmers, you’ll watch the hardened sugar start to melt and dissolve right back into the water. You can give it a gentle nudge with a wooden spoon or silicone spatula to help break up any large pieces as they soften. After just a few minutes of simmering, the pot should be almost completely clean. Carefully pour out the hot sugar water and give it a final wash as usual.
How Do I Clean Burnt-On Oil from a Nonstick Pan?
 | Farberware Dishwasher Safe Nonstick Cookware Pots and Pans Set, 15 Piece, Pewter |
Ah, that sticky, brownish film of burnt-on oil. It’s a common sight on nonstick pans, and it’s completely immune to regular soap and water. This stubborn residue is called polymerized oil, and you have to tackle it carefully to avoid wrecking the pan's delicate coating.
The safest way to remove it is with a simple baking soda paste.
- Mix baking soda with a few drops of water until you have a thick paste, almost like toothpaste.
- Gently rub this paste over the sticky residue using a soft cloth or a non-abrasive sponge.
- Let the paste sit on the pan for about 20-30 minutes. This gives the baking soda time to work its magic and break down the sticky oil buildup.
Once time is up, rinse the pan with warm water, using your cloth to wipe away the loosened gunk and leftover paste.
It is absolutely crucial to never use steel wool, abrasive cleaners, or metal utensils on a nonstick surface. They will permanently scratch the coating, ruining the pan and rendering it useless.
At Cookware Review Hub, we live and breathe kitchen tools, from helping you choose the right ones to keeping them in top shape. Find more expert reviews, comparisons, and maintenance guides to keep your cookware performing like new. Explore all our resources at https://www.cookwarereviewhub.com.


