
Seasoning a carbon steel wok is the first, most crucial step you'll take with your new piece of cookware. We're essentially using thin layers of oil, heated past their smoke point, to create a natural, non-stick surface called a patina. This process, called polymerization, is what transforms a simple steel pan into a high-performance cooking machine, protecting it from rust and keeping food from sticking. It's the secret to unlocking your wok's true potential.
Now loading...
Why Seasoning Your Wok Is a Culinary Game Changer

Now loading...
Before you even think about tossing your first batch of garlic and ginger into that shiny new wok, you need to understand why seasoning is so non-negotiable. This isn't just about cleaning off the factory coating. It's a foundational process that turns a piece of metal into something that will serve you for decades. Think of an unseasoned wok as a blank canvas—it's got potential, but it's not ready for a masterpiece just yet.
The whole ritual is grounded in a simple bit of kitchen science: oil polymerization. When you heat an incredibly thin layer of fat to a high temperature, its molecules literally break down and reform into a new, plastic-like substance that bonds directly to the microscopic pores of the steel. This new surface is what becomes slick, durable, and naturally non-stick.
The Science of Flavor and Function
Every time you cook, that patina gets a little stronger, a little darker, and a little more non-stick. It's a living surface, and it’s what gives a well-loved wok its signature jet-black gloss. But this does more than just help your fried rice slide out of the pan; it fundamentally changes the way your food cooks.
This technique is an ancient practice, a cornerstone of Chinese cooking for centuries. In fact, evidence suggests cooks during the Han Dynasty over two millennia ago were already mastering their woks. By the 10th century, historical records show over 70% of households in southern China owned a wok, making the seasoning process common knowledge.
The goal of seasoning isn't just to create a non-stick layer. It’s to build a foundation for achieving 'wok hei'—the distinct, smoky aroma and flavor that's the hallmark of exceptional stir-fry. This "breath of the wok" can only happen on a properly seasoned, super-heated surface.
More Than Just Non-Stick
A seasoned wok brings a lot more to the table than just preventing your noodles from sticking. Here are a few key advantages you'll notice right away:
- Rust Prevention: Carbon steel is mostly iron, which means it will rust if you look at it wrong. That polymerized oil creates a barrier that shields the metal from moisture and oxidation.
- Enhanced Durability: Seasoning fills in all the tiny pores in the metal, creating a harder and more resilient cooking surface that can stand up to intense heat.
- Superior Heat Control: A well-developed patina helps the wok heat more evenly and respond almost instantly to changes in the flame, giving you the precision control you need for great stir-frying.
This process is one of the biggest differentiators between cookware types. You can learn more about how it compares to other materials in our guide covering the https://www.cookwarereviewhub.com/cast-iron-wok-vs-carbon-steel/. Ultimately, understanding fundamental culinary principles, especially those involving fat and heat, is what makes it clear why seasoning is so effective. It’s the first and most important step in turning your wok into a true kitchen workhorse.
Prepping Your New Wok for Its First Seasoning
That brand-new carbon steel wok you just brought home isn’t quite ready for action. It comes with a protective factory coating to keep it from rusting on its journey to your kitchen, and your first job is to get every last bit of it off.
Think of this as preparing a canvas for a painting. If you don't start with a clean, bare surface, the paint—or in our case, the seasoning—will never stick properly. Skipping this step is the number one reason new woks fail to build that beautiful non-stick patina.
The process is simple but needs a bit of elbow grease. You'll want hot water, dish soap (this is one of the very few times soap will touch your wok), and something abrasive like steel wool or the green side of a scouring sponge. Now is not the time to be gentle; the goal is to strip it down to the bare metal.
The Scrub Down Process
Get your wok in the sink and start scrubbing with hot, soapy water. Use firm, circular motions and make sure you cover the entire wok, inside and out. You're not just cleaning it—you're aggressively removing that industrial sealant.
You'll probably see some gray, murky water rinsing off. That's a good sign! It means the coating is coming off just like it's supposed to. Keep at it until the entire surface has a dull, uniform, almost matte look. A new wok usually has a slight sheen, but a properly prepped one will have lost all of its factory shine.
Key Takeaway: Your eyes are your best tool here. If you still see shiny streaks or patches, that’s leftover coating. A perfectly prepped wok will have a consistent, non-reflective gray finish.
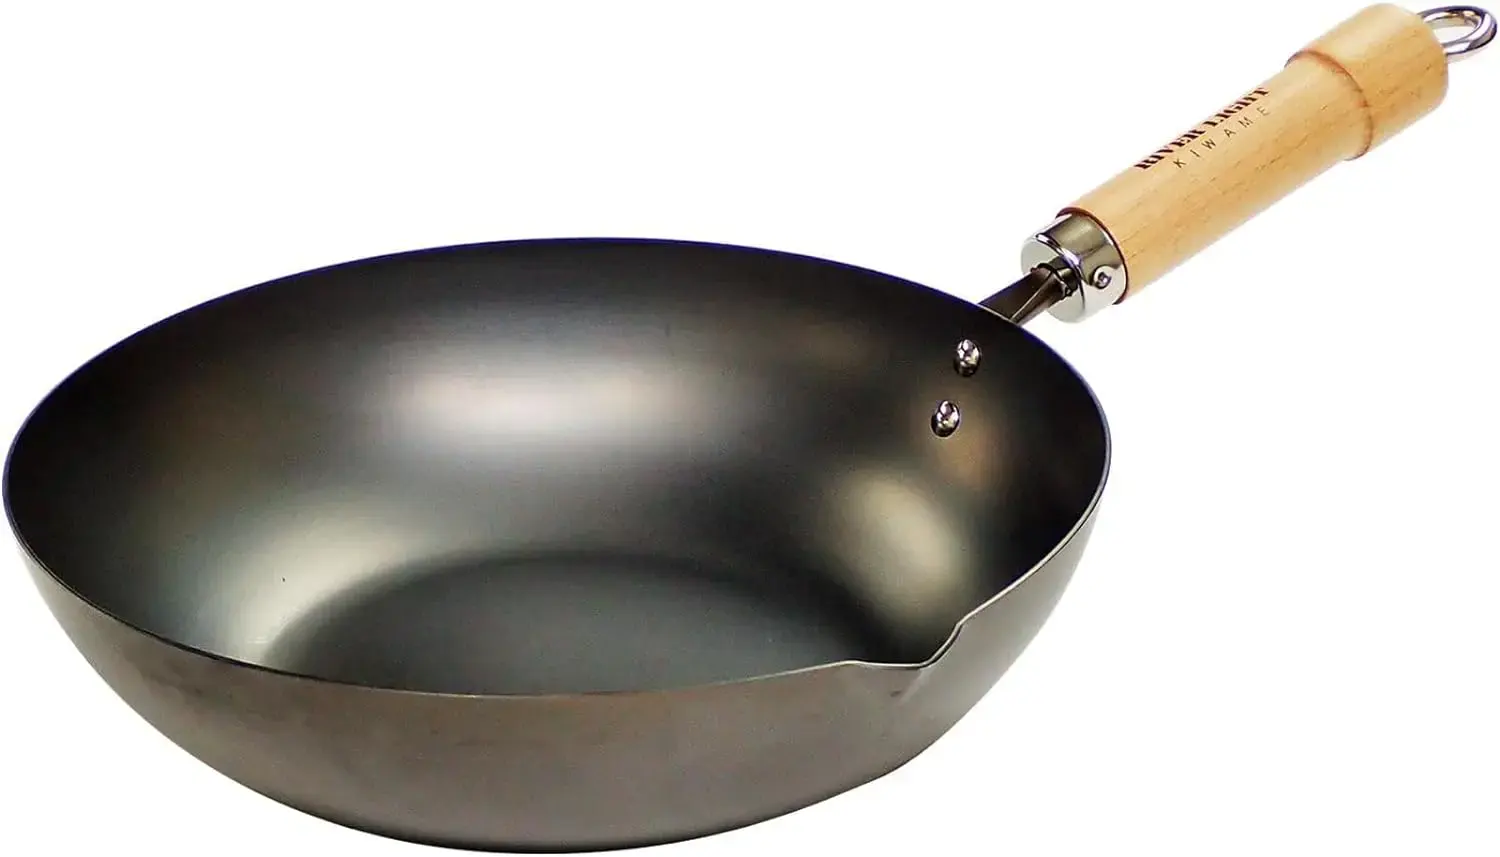 | (Riverlight) River Light Iron Frying Pan, Extreme Japan, 10.2 inches (26 cm), Induction Compatible, Made in Japan, Wok |
The Critical Drying Stage
Once you're satisfied the coating is gone, give the wok a final, thorough rinse with hot water to wash away any soap. Now for the most time-sensitive step: you have to dry it immediately to prevent flash rust. With its protective layer gone, the raw carbon steel will start to oxidize and rust within minutes if left wet.
Towel drying isn't enough. The absolute best way is to put the wok right on a stove burner over low to medium heat. If you're working with a flat cooktop, our guide on using a wok on a glass top stove has some crucial tips for doing this safely and effectively.
You’ll see the last few water droplets sizzle and evaporate in seconds. Even after it looks dry, leave it on the heat for another minute or two. This does two very important things:
- Guarantees Total Dryness: It forces every bit of moisture out of the microscopic pores of the steel.
- Opens the Pores: The heat makes the metal expand slightly, opening up those pores so they're ready to drink in the seasoning oil.
When the wok is completely bone-dry and warm to the touch (be careful!), you've done it. You have a perfect blank canvas, fully prepped and ready for its first foundational layer of seasoning.
Mastering the Classic Stovetop Seasoning Method
Alright, let's get to the best part: seasoning your new carbon steel wok right on the stovetop. This is the traditional, hands-on way it’s been done for generations, turning a simple piece of steel into a non-stick powerhouse. It’s a process you can see, smell, and feel, creating a real connection between you and your new favorite pan.
What we're about to do is kick off a chemical reaction called polymerization. It’s the foundation of your wok’s non-stick surface. This will involve some serious heat, a little bit of oil, and good ventilation—so crack a window or flip on your exhaust fan now. You're going to make some smoke, and that's not just okay; it's the whole point.
The Art of Bluing Your Wok
Before a single drop of oil touches that pan, we need to "blue" the steel. This is a visual cue that the wok is screaming hot and its pores are wide open, ready to bond with the seasoning. Honestly, it’s a beautiful thing to watch.
Get your clean, bone-dry wok on your most powerful burner and crank the heat to high. Gas stoves are king here because the flames can wrap around the sides and heat the whole surface evenly. Let the wok sit on that intense heat, using an oven mitt to rotate it every minute or so. You want to make sure every single inch gets blasted by the flame.
You'll see the silver-gray metal start to shift colors, moving through shades of yellow and brown before finally settling into a stunning, iridescent blue-black. This color change is the steel oxidizing at a high temperature, creating a stable foundation that helps that first layer of oil stick for good.
Expert Tip: Don't be shy with the heat. The goal is to get the entire wok—from the center all the way up to the rim—to hit that uniform blue-black color. This initial high-heat blast is what sets you up for a tough, long-lasting patina.
The infographic below breaks down the initial prep steps that get you to this crucial heating stage.

Think of this as the journey from a factory-fresh wok to a perfectly prepped canvas, ready for the transformative power of heat and oil.
Applying the First Layer of Oil
Once your wok is fully blued, knock the heat down to medium-low and let it cool for just a minute. Now it's oil time. The absolute key here is to use an impossibly thin layer. Using too much oil is the number one mistake people make; it doesn't polymerize correctly and just turns into a sticky, gummy disaster.
Here’s how you nail it:
- Pour about a teaspoon of a high-smoke-point oil into the wok. Grapeseed, canola, and sunflower oil are all great choices.
- Grab a wadded-up paper towel with some tongs (safety first!) and wipe that oil over every single square inch of the wok's interior.
- Now, take a clean paper towel and wipe it all out again. Seriously. It will look like you've removed all the oil, but a microscopic film is left behind. That's exactly what you want.
With that micro-layer of oil applied, turn the heat back up to medium-high. Soon, you'll see the wok start to smoke. That’s polymerization in action—the oil is breaking down and bonding directly to the steel. Keep the wok on the heat, giving it a swirl every so often, until the smoke completely dies down. That’s your signal that the layer is fully baked on.
This isn’t just kitchen folklore; there’s real science at play. The carbon steel wok market, valued at around $1.2 billion in 2023, is built on this very process. Research shows that heating the wok to 350–450°C (662–842°F) creates the perfect conditions for polymerization. In fact, a 2021 study found that a properly seasoned wok can cut down on food sticking by up to 85%. After just 10 seasoning cycles, the surface can even become 15% harder.
Building Up the Patina
One layer is a start, but it’s not enough for a truly non-stick surface. The real magic happens with repetition. You'll want to repeat this whole process—oiling, heating, and smoking—at least three to four times to build a solid foundational patina.
Each cycle will make the wok a little darker. Don't sweat it if it looks splotchy or uneven at first; that's totally normal. The color will eventually even out into a beautiful, uniform black with regular cooking. Our guide on the best oil to season a wok and includes other expert tips for perfection digs even deeper into this.
After your final layer has finished smoking, kill the heat and just let the wok cool down completely on the stovetop. Once it's cool to the touch, it's officially seasoned and ready for its first cook. Your wok's journey to non-stick glory has officially begun.
Trying Out Different Wok Seasoning Methods
While the classic stovetop method gives you fantastic, hands-on results, it's not the only way to get a perfectly seasoned carbon steel wok. Your kitchen setup and even your comfort level might make another technique a better fit.
Not everyone has a high-powered gas burner capable of blasting a wok with heat, but that shouldn't stop you from building that slick, durable patina we're all after. Let's walk through a couple of powerful alternatives that work incredibly well, especially if you're working with an electric or induction cooktop.
The Oven Seasoning Method
This is my go-to recommendation for anyone using an electric or induction stove. It's a nearly foolproof, "set-it-and-forget-it" technique that uses consistent, ambient heat to polymerize the oil. The result is an incredibly even and uniform initial seasoning layer, often without the patchiness you can sometimes get on a stovetop.
First things first, you’ll follow the exact same oiling procedure as the stovetop method. Apply a micro-thin layer of a high-smoke-point oil, then wipe it all out with a clean paper towel until the wok looks almost dry. Don't skip this. Too much oil in the oven will bake into a sticky, tacky mess that you'll have to scrub off.
Key Insight: The oven's biggest advantage is its all-encompassing heat. Unlike a burner that heats from the bottom up, the oven surrounds the wok, making sure every inch—including the handle socket and the exterior—gets seasoned evenly and all at once.
Once you’ve wiped out the oil, place your wok upside down on the center rack of your oven. I always pop a sheet of aluminum foil on the rack below just in case there are any drips. Now, it's time to crank the heat.
- Temperature: Set your oven to a temperature just above your oil's smoke point. For something like grapeseed or canola oil, 450°F (232°C) is a great target.
- Time: Let the wok bake for one full hour. Your kitchen is going to get a bit smoky, so make sure you've got a window open or a fan running.
- Cool Down: After an hour, just turn the oven off. The most important part is to let the wok cool down completely inside the oven. This slow cool-down process helps the new seasoning layer cure properly.
This single cycle creates a fantastic base layer. You can always repeat it for a darker, more robust finish, but even one round gives you a solid, non-stick foundation to start cooking on.
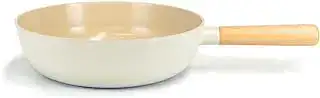 | NEOFLAM FIKA 10" Stir Frying Wok for Stovetops and Induction | Wood Handle and Nonstick Ceramic Coating | Made in Korea (10" / 26cm) |
The Outdoor Burner Method
If you want to get a professional-grade seasoning fast—and without smoking up your entire house—taking the process outside is an excellent choice. Using a high-BTU burner, like one from a turkey fryer kit or a dedicated outdoor wok station, gives you the intense, enveloping flame needed for rapid and super-effective seasoning.
This method is the closest you'll get to the power of a commercial kitchen range. The sheer BTUs allow you to blue the entire wok in a fraction of the time and hit incredibly high temperatures for a hard, durable polymerization. It's serious business.
But all that power demands respect and caution. You’re working with a live, powerful flame, so this should only be done in a well-ventilated outdoor space, far away from anything flammable. I always recommend having a fire extinguisher nearby, just in case.
The process of applying thin layers of oil and heating until the smoke stops is the same, but it happens much faster. A single layer that might take 10 minutes on an indoor stove can be done in just two or three minutes on a high-output burner. The results are incredible: a deep, dark, and wonderfully slick surface, built in record time.
Seasoning Method Comparison
To help you decide which path is right for you, here’s a quick breakdown of the three main approaches to seasoning your wok. Each one has its place, depending on your equipment and your goals.
| Method | Best For | Pros | Cons |
|---|---|---|---|
| Stovetop | Gas ranges; those who want a hands-on, traditional experience. | Fast results, great control over heat application, builds a strong bond. | Can be uneven on electric/induction, smokes up the kitchen. |
| Oven | Electric or induction cooktops; beginners wanting an even first coat. | Extremely even seasoning, less hands-on time, seasons entire wok. | Takes longer (over an hour), still creates smoke, not all woks fit. |
| Outdoor Burner | Anyone with outdoor space and a high-BTU burner; achieving pro-level results quickly. | Very fast, creates an incredibly hard and durable patina, no smoke indoors. | Requires special equipment, must be done outdoors, requires safety precautions. |
Ultimately, there's no single "best" method—just the best one for your situation. Whether you're carefully turning your wok over a gas flame or letting the oven do the heavy lifting, the goal is the same: building that beautiful, non-stick patina that makes wok cooking so rewarding.
How to Maintain and Re-Season Your Wok for Life

That initial seasoning is a huge first step, but the real magic—that deep, slick, non-stick patina of a truly legendary wok—isn't built in a day. It’s forged over time, through countless stir-fries and a little bit of consistent, mindful care.
A well-seasoned wok is a living thing. Think of it like an investment; every time you cook and clean it properly, you're making a deposit into its "non-stick bank account." These daily rituals are simple but absolutely crucial for protecting that investment and making sure your wok lasts a lifetime.
The Post-Cook Ritual
The most important moments in your wok's daily life happen in the few minutes right after you plate your food. How you clean it determines whether you’re building that beautiful patina or accidentally stripping it away.
The golden rule is simple: never use harsh soap, and never let it soak.
Here’s the quick and effective process I follow every single time:
- Rinse Immediately: While the wok is still hot (but not screaming hot), I take it straight to the sink and hit it with hot water. The residual heat creates steam that lifts off most of the food particles instantly.
- Gentle Scrub: A bamboo wok brush or a soft sponge is all you need to gently scrub away any stubborn bits. If something is really stuck, a paste made of coarse salt and a little oil works wonders as a mild abrasive.
- No Soaking: This is the big one. Never, ever leave your wok to soak in the sink. It's the fastest way to invite rust and undo all the hard work you’ve put into the seasoning.
Once it's clean, the next step is just as critical.
Drying and Oiling for Protection
Water is the sworn enemy of carbon steel. You have to get your wok completely, totally, bone-dry after every single wash to stop rust in its tracks. A dish towel just won't cut it.
Place the clean, damp wok back on the stove over low heat for a minute or two. You’ll literally see the last traces of moisture evaporate before your eyes. This not only prevents rust but also keeps the pores of the steel open for the final, crucial step: the maintenance coat.
Once it's dry, kill the heat. Add just a half-teaspoon of your seasoning oil and use a paper towel to wipe a micro-thin layer over the entire interior surface. This tiny film of oil is your wok’s armor against humidity and oxidation until you use it next.
This simple clean-dry-oil routine is the bedrock of wok longevity. It takes less than three minutes but makes all the difference in developing a deep, stable, and flawlessly non-stick surface.
When and How to Re-Season Your Wok
Even with perfect daily care, your seasoning might need a more serious touch-up now and then. Cooking with acidic ingredients like tomatoes or vinegar can sometimes lighten the patina, or you might notice a few dull spots where food has started to stick. This doesn't mean you've failed! It just means it’s time for a quick re-seasoning session.
The art of maintaining a wok is definitely catching on. In the United States, carbon steel wok sales grew over 300% between 1985 and 2020. A 2022 survey found that 52% of home cooks who own one season it at least monthly, while an impressive 23% do it after every single use.
The most common method involves heating the wok to 400–450°F, wiping on a thin layer of oil, and letting it polymerize for 10–15 minutes. In fact, studies show that after just 5–10 of these cycles, the non-stick performance can improve by up to 70%.
Dealing with Rust: A No-Panic Guide
Spotting rust on your beloved wok can feel like a disaster, but trust me, your wok is not ruined. It’s an easy fix.
- Scrub Away the Rust: Grab some steel wool and a bit of water and scrub away all the visible rust. You want to get all the way down to the bare, silver metal underneath.
- Wash and Dry: Now, wash the wok with a little soap and water to get rid of any rust particles, then rinse it thoroughly. Immediately pop it back on the stove to dry it completely.
- Start Over: Once it's dry, you have a blank canvas. It's time to perform a full initial seasoning. Apply 3-4 new layers of oil, just like you did when the wok was brand new.
Your wok will be back in action, ready to continue its journey toward non-stick perfection. Of course, great cooking goes beyond just one pan; having a complete kitchen essentials checklist can make all your culinary adventures that much smoother.
Got Wok Questions? I've Got Answers
Even after you've nailed that initial seasoning, questions are going to come up. That’s just part of the journey. Taking care of a carbon steel wok is a hands-on skill, and a little troubleshooting is how you really get to know your pan. This is your go-to guide for those "what now?" moments.
Think of it this way: with the right advice, you can fix pretty much any issue and keep your wok slick, non-stick, and ready for action for years to come.
What Is the Best Oil to Season a Carbon Steel Wok?
The best oils for the job have two things in common: a high smoke point and a neutral flavor. You need an oil that can take the screaming-hot temperatures without turning into a smoky, sticky mess. It also shouldn't make your kung pao chicken taste like something else entirely.
My go-to recommendations are grapeseed, canola, sunflower, or soybean oil. They're cheap, easy to find, and polymerize beautifully, creating that hard, slick, and durable layer of seasoning we're after.
While you can use traditional fats like lard, modern refined oils are just more consistent and less likely to impart funky flavors. The one category to steer clear of? Low-smoke-point oils like extra virgin olive oil or unrefined flaxseed oil. They’ll just burn and create a gummy, acrid mess instead of that glassy patina.
Why Is My Seasoned Wok Sticky?
A sticky or tacky surface is the number one sign you've used too much oil. It's an incredibly common mistake, so don't sweat it. When the layer of oil is too thick, it can't fully transform—or polymerize—into that hard, plastic-like coating. Instead, you've just baked on a gooey residue that food loves to grab onto.
The goal is always a microscopic, almost invisible film of oil. After you wipe the oil on, you need to grab a clean paper towel and wipe it all back out until the wok looks practically dry. That impossibly thin sheen left behind is all you need.
The Fix Is Simple: Just scrub that sticky layer off with hot water and a stiff brush or a scouring pad. Dry the wok completely on the stove, and give the seasoning process another shot. This time, be ruthless about wiping out that excess oil before you apply any heat.
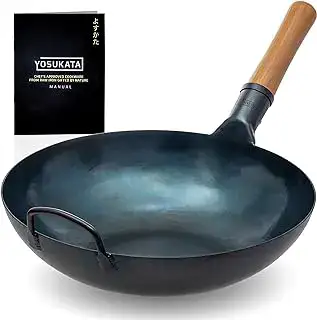 | YOSUKATA Flat Bottom Wok Pan - 13.5" Blue Carbon Steel Wok - Preseasoned Carbon Steel Skillet - Traditional Japanese Cookware - Carbon Steel Pan for Electric Induction Cooktops Woks and Stir Fry Pans |
How Do I Remove Rust From My Carbon Steel Wok?
Seeing rust on your beloved wok is a gut-punch, but it's completely fixable. Don't panic. Rust usually shows up when the wok was put away while still a little damp or was left in a humid spot without a protective coat of oil. Carbon steel is mostly iron, so this is just what it does when given the chance.
Here’s how you bring it back from the brink:
- Scrub the Rust Away. Get in there with steel wool or a coarse scouring pad and scrub the rusted spots. A little water or a paste of baking soda and water can help lift it. You want to keep going until you're down to the bare, silver metal.
- Wash and Dry—Fast. Rinse the wok with soap and water to get rid of all the rust particles. The second it's rinsed, put it right on a stove burner over low heat.
- Heat Until It's Bone-Dry. Let the wok heat up until every single drop of moisture is gone. This step is crucial for preventing "flash rust" from forming on the freshly exposed steel.
- Re-season Immediately. With the wok dry and warm, you've got a clean slate. It's time to apply a thin layer of oil to protect that bare metal and start building up your patina all over again.
Can I Use Soap to Clean My Seasoned Wok?
This is one of the great debates in the cookware world, but the modern answer is pretty clear: yes, on a well-established, mature seasoning, a tiny drop of mild dish soap is totally fine. A strong, fully polymerized patina is surprisingly tough and won't be stripped away by a little soap.
That said, for everyday cleaning, you probably don't even need it. Hot water and a quick scrub with a bamboo wok brush or a soft sponge are usually all it takes to dislodge any food bits. The real keys are to avoid harsh detergents, abrasive metal scrubbers (unless you're trying to strip it), and—most importantly—to never, ever let your wok soak.
Whether you use a touch of soap or not, the ritual after washing is what truly matters. Always dry your wok on the stove until it's completely dry, then wipe a whisper-thin film of oil inside before you put it away. This simple habit is your best defense against rust and keeps your patina in prime condition.
At Cookware Review Hub, we're dedicated to helping you master your kitchen tools with confidence. From choosing the right pan to maintaining it for a lifetime, we provide the expert insights you need for better cooking. Explore our full library of guides and reviews to find the perfect gear for your culinary adventures. Discover more at https://www.cookwarereviewhub.com.


